In the Mailship portal, you have two options for creating expeditions:
Create individually
Upload in bulk via import
On this page, we will look at how to create an individual expedition. If you are interested in setting up expeditions in bulk via import, follow this guide: Creating Expeditions in Bulk via Import
Creating an Individual Expedition
Expeditions → +Create new
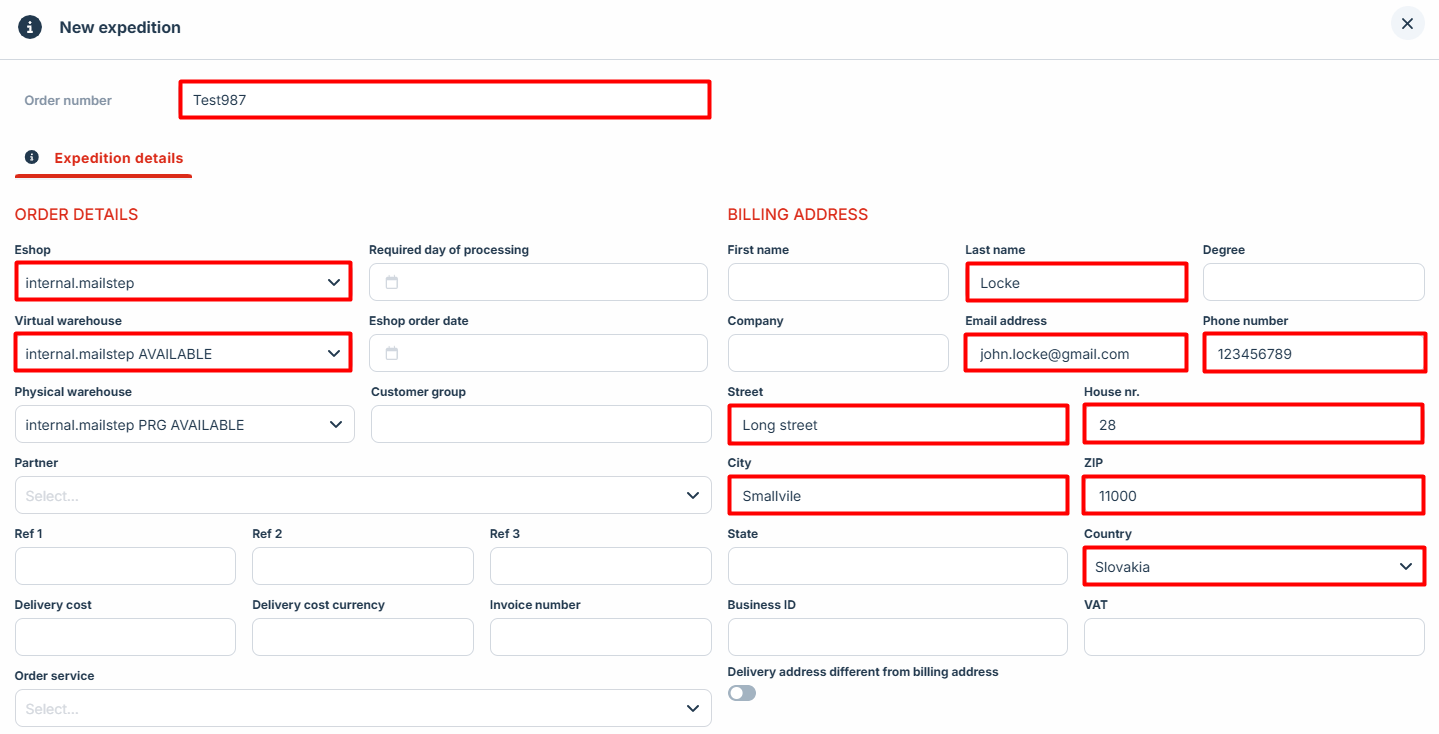
Mandatory Fields
Expedition Details
Order number
Eshop
Virtual warehouse
Billing Address (Recipient Details)
Last name
Email address, Phone number
Street, House nr.
City, ZIP, Country
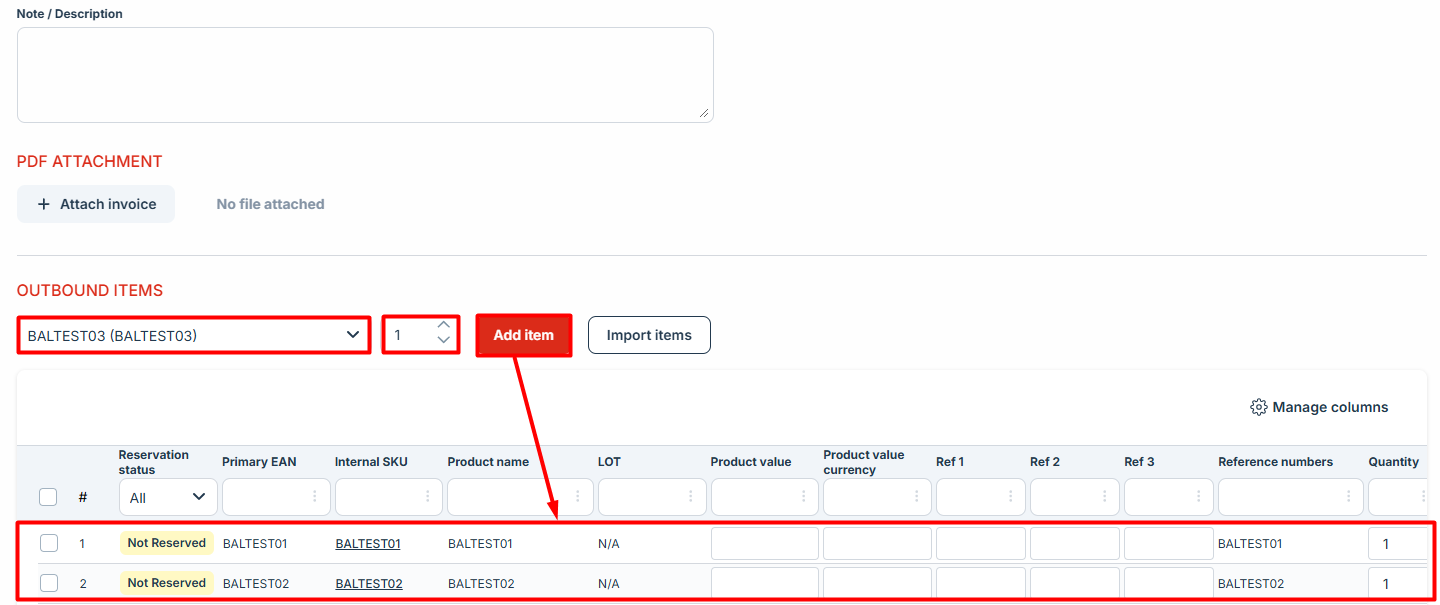
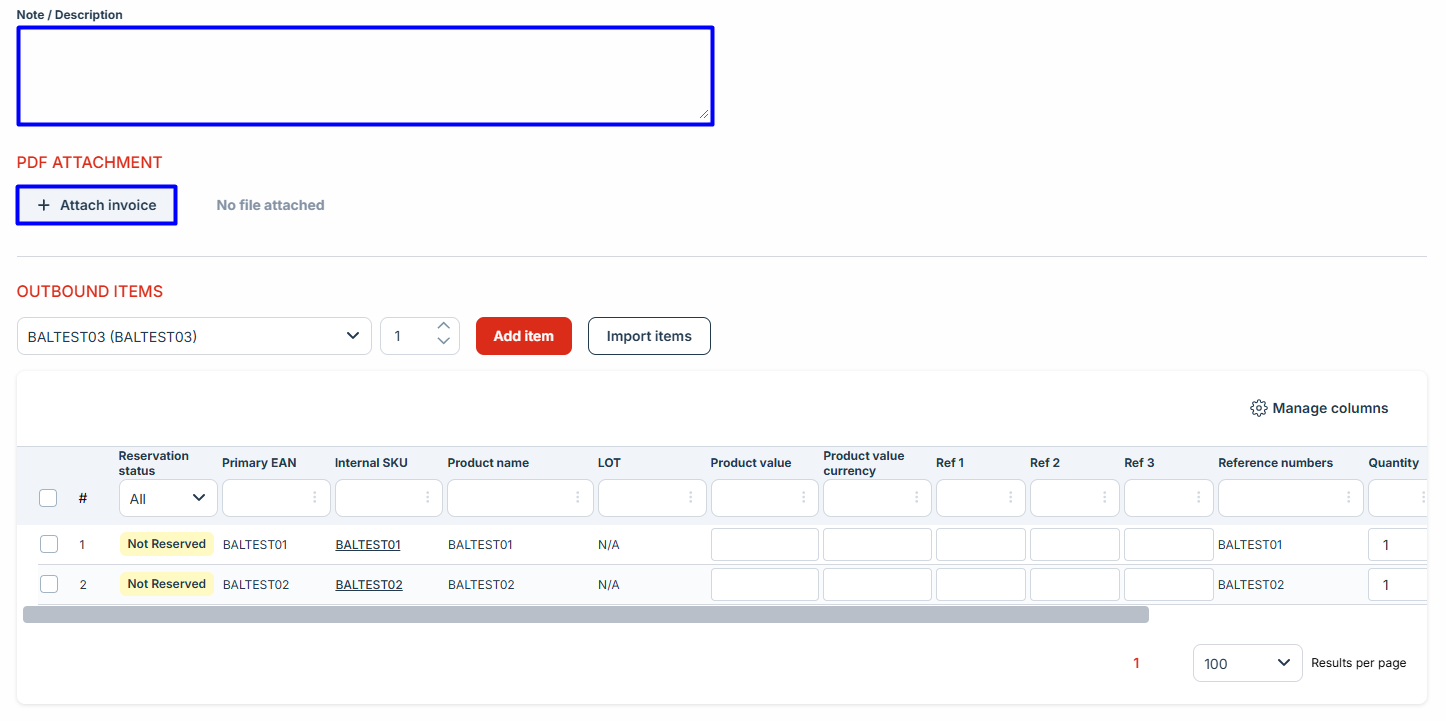
Outbound items
In the full-text search field, enter the SKU, EAN, or product name.
Select the quantity of the item you want to include in the expedition.
Add Item
Import items
How to import items
Next to adding individual items, click the Import items button.
Download the template in the required format.
Fill in the Product SKU, either the EAN code (Primary EAN) or Internal SKU (Internal SKU).
Enter the quantity of the product in the Quantity field.
Save the completed template.
Return to the form, select Import items → Choose file → Import files.
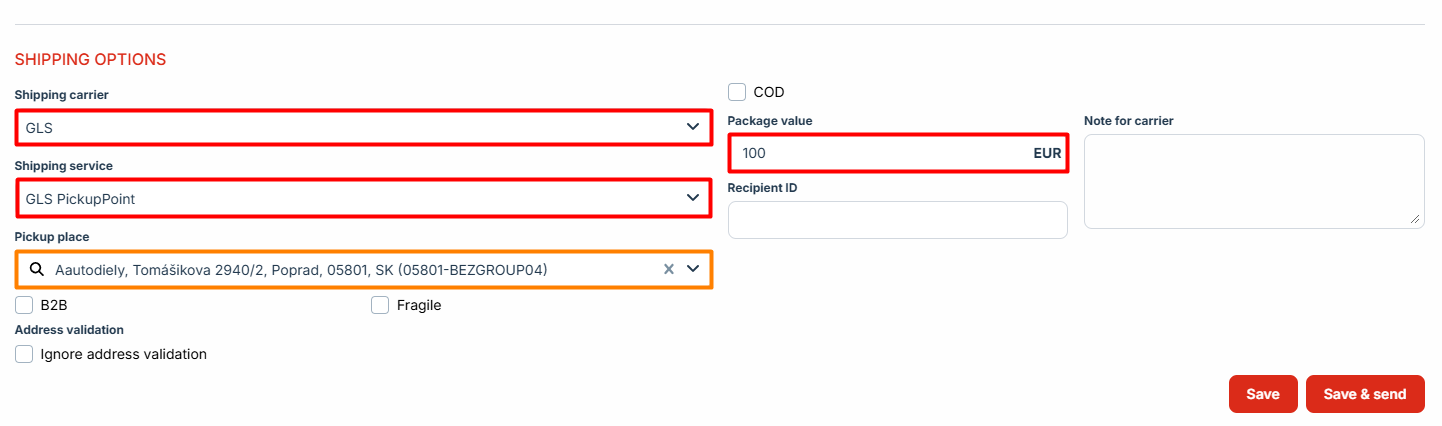
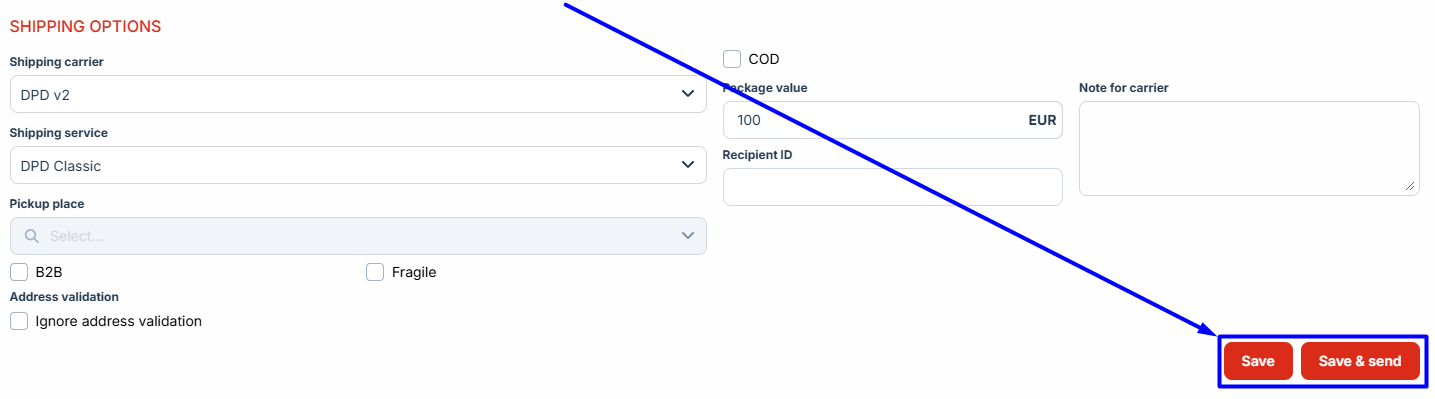
Shipping Selection
Shipping carrier
Shipping service
Pickup place – Required when using a shipping service with pickup locations.
Additional
Package value
If the product cannot be found, check the following:
Whether the product is assigned to your e-shop.
Whether the product is not deactivated.
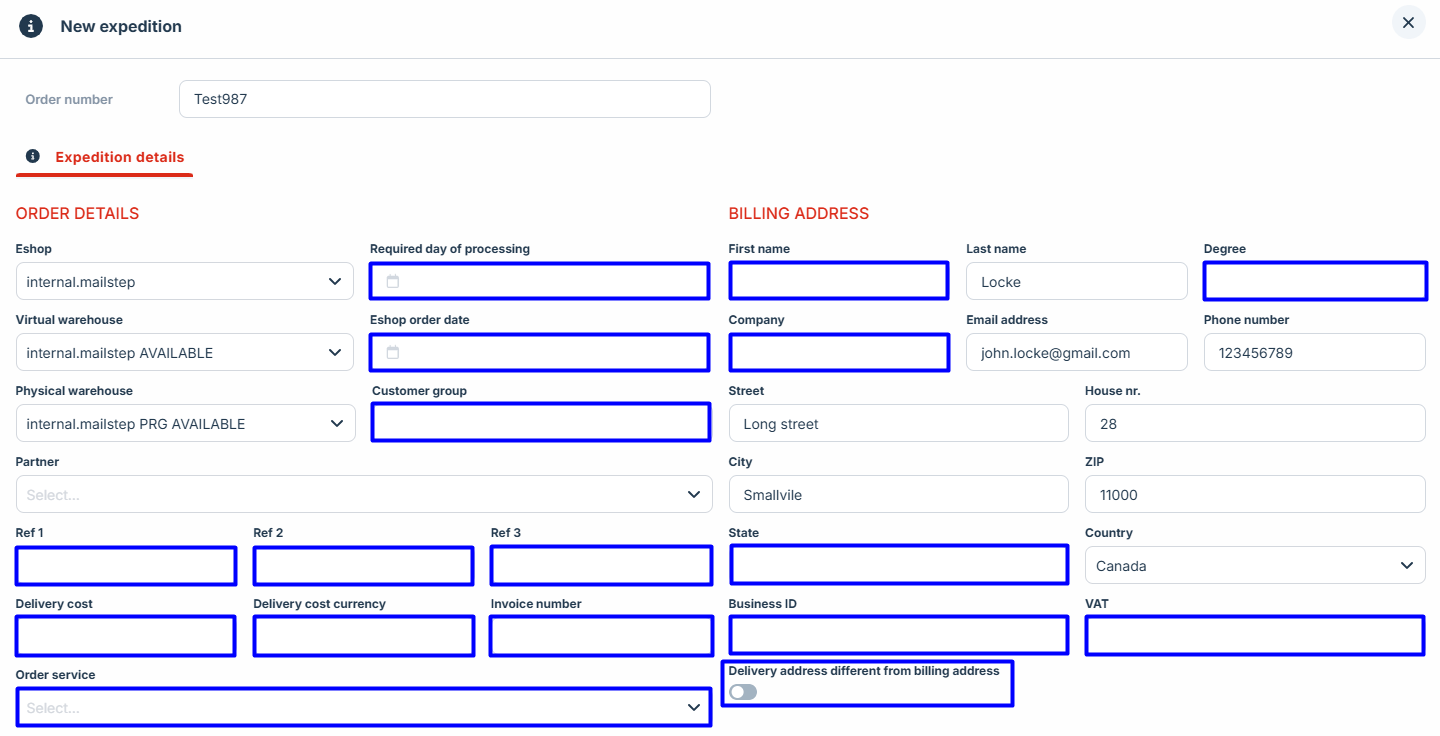
Optional Fields
Expedition Details
Required day of processing – The date when the warehouse begins processing the order. If no date is selected, today's date is set automatically.
Eshop order date – A record for your reference indicating the date the order was created in your e-shop.
Customer group – A record for your reference that allows customers to be grouped by category.
Partner – A template to simplify data entry. Selecting a partner automatically fills in billing and delivery details. You can save and manage partners in the user administration. More information can be found in the manual: User Administration | Partners
Ref1, Ref2, Ref3 – These fields allow for further specification of the order. For some sales channels, filling these out is essential for correct integration with other systems (e.g., order numbers).
Delivery costs – A record for your reference regarding delivery-related expenses.
Delivery cost currency – A record for your reference about the currency in which delivery costs are charged.
Invoice number – A record for your reference regarding the invoice associated with the order.
Order service – Here, additional services such as eco-packaging may be available. For more information about available services, refer to the manual: Services and Functions for Expeditions
Note / Description – A field for your notes.
Billing address (Recipient Details)
First name, Degree, Company, Business ID, VAT
PDF Attachment
Attach invoice - If you attach an invoice in PDF format, it will be automatically printed and included in the package during packing (this service is subject to a fee). For more information about available services, refer to the manual: Services and Functions for Expeditions
Additional Options
COD - When choosing cash on delivery, you must fill in the following details:
Variable symbol
COD value
B2B - Select this option if you want a packing list included with each package and a summary delivery note with information about all packages. More information about available services can be found in the manual: Services and Functions for Expeditions
Fragile - If you check the "Fragile" box, the package will be labeled with a "Fragile" sticker (this service is subject to a fee). For more information about available services, refer to the manual: Services and Functions for Expeditions
Note for carrier - A note for the courier to convey special delivery instructions, such as "Do not ring the bell, leave at the door." This note is forwarded to couriers that support this feature.
Recipient ID - This field should be filled out specifically for the DHL Connect carrier and when sending to pickup locations.
Difference Between "Save" and "Save and send"
Save – Saves changes, but the order remains on hold.
Save and send – Saves changes and sends the order for processing.
JavaScript errors detected
Please note, these errors can depend on your browser setup.
If this problem persists, please contact our support.